Spring Boot2 + Spring Security5 基于Redis的Spring Session管理(5)

前言

前面几篇文章介绍了如何在Spring Boot 引入Security,并实现自定义登录,以及记住我功能

那么这篇文章,是想讲述下关于Session在Spring Security的管理以及实现过程

简单流程

传统Web应用中,一般都是是使用tomcat、weblogic、jboss等Web容器去部署应用,然后每个Web项目部署在对应一个或多个Tomcat(很少会这样)中,每个Web项目是相互独立的,每个项目都会拥有自己的Session,并且是相互独立的,传统部署方案如图:

Spring Boot2 _ Spring Security5 基于Redis的Spring Session管理_5_ - 01.png

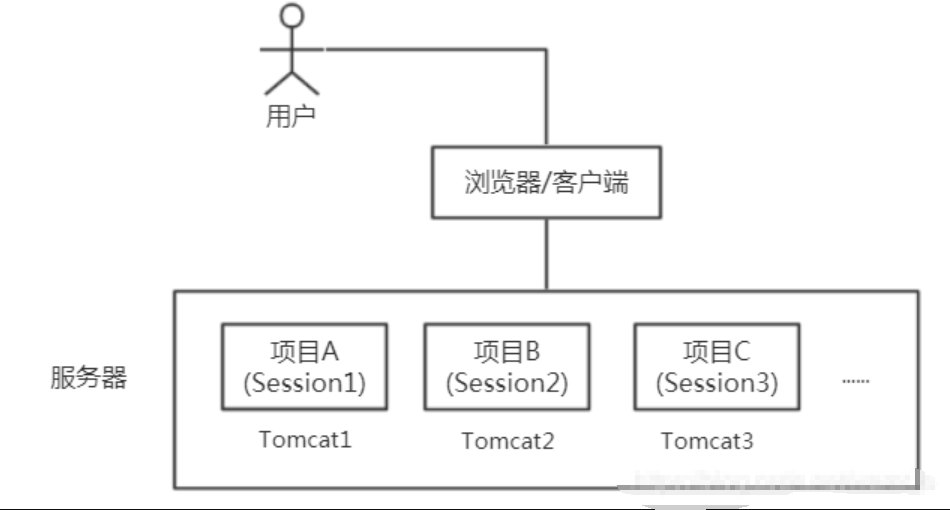
假如说现在有这么个需求,就是说现在有三个项目A、B和C,如上图所示,那么现在如果我想登录了其中任意一个项目系统之后,接下来再进入其他项目系统的时候,可以不需要再次登录而直接进入,这就是单点登录

那么,目前来看,各个项目的Session都是独立的,要实现起来是非常复杂的。对此,为了解决这个问题,这里就需要让这三个项目都共享同一个Session,就可以完美解决,那么实现思路就是把Session存入中间件中,当需要认证的时候就从中间件中去取出判断,如图:

Spring Boot2 _ Spring Security5 基于Redis的Spring Session管理_5_ - 02.png

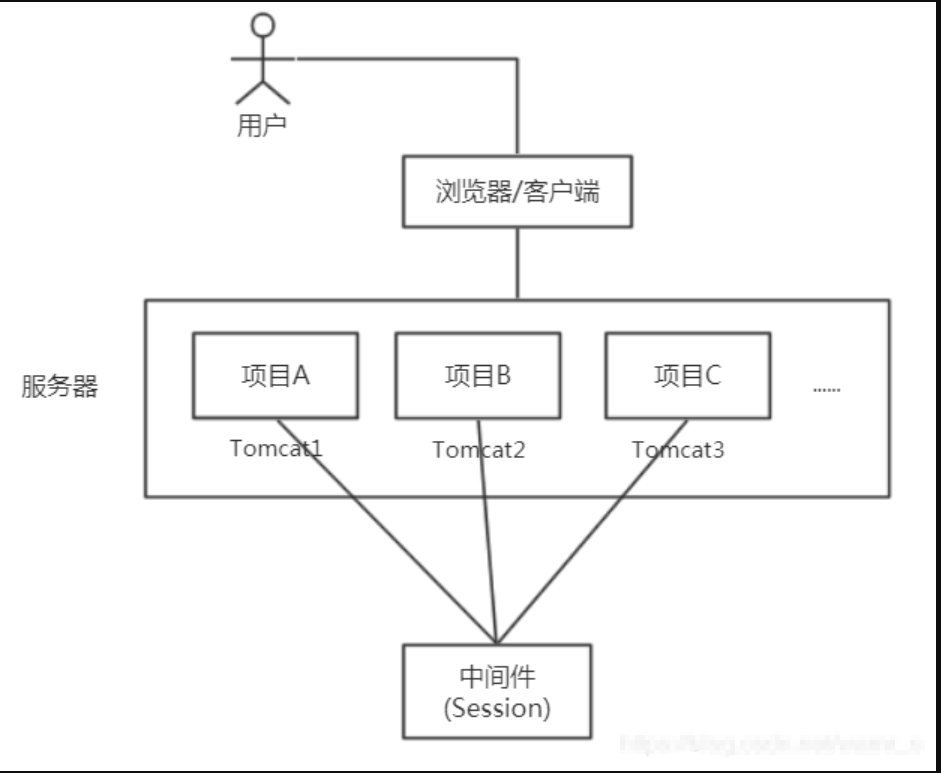
中间件一般就是使用Redis/Memcache去存储Session,大致上是这么个流程
当然,Session存储在中间件上也是有很多其他好处,像服务器重启了Session也不会被销毁等等

那么,这里讲了那么多,目的是为了说明整合Spring Session与Redis的原因,那么下面开始展示代码

实现

还是基于前面几篇文章的代码上,我们要引入了Spring Session和Redis依赖:

1
2
3
4
5
6
7
8
9
10
11
12
13
<dependency>
<groupId>org.springframework.session</groupId>
<artifactId>spring-session-data-redis</artifactId>
</dependency>
<dependency>
<groupId>org.springframework.boot</groupId>
<artifactId>spring-boot-starter-data-redis</artifactId>
</dependency>
<!--Lettuce pool 连接池-->
<dependency>
<groupId>org.apache.commons</groupId>
<artifactId>commons-pool2</artifactId>
</dependency>

这里要说明下,Redis的连接方式一般分为Jedis 和Lettuce ,相信大家对Jedis会比较熟悉,不过在Spring Boot2.x之后,已经默认为Lettuce连接方式

Lettuce是基于Netty框架,通过异步方式可以更好的节省系统资源,并且能在多个线程间并发访问,满足了多线程环境要求,这也是让博主转向了Lettuce的原因

yml配置如下:

application.yml

1
2
3
4
5
6
7
8
9
10
11
12
13
14
15
16
17
18
19
20
21
22
spring:
datasource:
driver-class-name: com.mysql.cj.jdbc.Driver
url: jdbc:mysql://127.0.0.1:3306/test?useUnicode=true&characterEncoding=UTF-8&serverTimezone=UTC
username: root
password: root
jpa:
database: MYSQL
show-sql: true
hibernate:
ddl-auto: update
database-platform: org.hibernate.dialect.MySQL5InnoDBDialect
redis:
database: 0 #索引
host: 127.0.0.1
port: 6379
password: #修改成对应自己的redis密码
lettuce:
pool:
max-active: 8 #最大连接数
max-idle: 8 #最大空闲连接
min-idle: 0 #最小空闲连接

这里只是新增了redis的基础信息配置

接下来看看Spring Session配置类:

SessionConfig.java

1
2
3
4
5
6
7
8
9
10
11
12
13
14
15
16
17
18
19
20
21
22
23
/**
* Copyright 2020. javaymw.com Studio All Right Reserved
* <p>
* Create on 2020-06-06 15:03
* Created by zhaoxinguo
* Version 2.0.0
*/
package com.javaymw.demo.config;

import org.springframework.context.annotation.Configuration;
import org.springframework.session.data.redis.config.annotation.web.http.EnableRedisHttpSession;

/**
* @description: Spring Session配置类
* @author zhaoxinguo
* @date 2020/6/6 15:03
*/
@Configuration
@EnableRedisHttpSession
public class SessionConfig {


}

对的,你没看错,只要加上@EnableRedisHttpSession注解就默认开启了Spring Session

然后就是Redis的配置类:

RedisConfig.java

1
2
3
4
5
6
7
8
9
10
11
12
13
14
15
16
17
18
19
20
21
22
23
24
25
26
27
28
29
30
31
32
33
34
35
36
37
38
39
40
41
42
43
44
45
46
47
48
49
50
51
52
53
54
55
56
57
/**
* Copyright 2020. javaymw.com Studio All Right Reserved
* <p>
* Create on 2020-06-06 15:05
* Created by zhaoxinguo
* Version 2.0.0
*/
package com.javaymw.demo.config;

import com.alibaba.fastjson.support.spring.FastJsonRedisSerializer;
import org.springframework.cache.annotation.EnableCaching;
import org.springframework.context.annotation.Bean;
import org.springframework.context.annotation.Configuration;
import org.springframework.data.redis.connection.lettuce.LettuceConnectionFactory;
import org.springframework.data.redis.core.RedisTemplate;
import javax.annotation.Resource;

/**
* @description: Redis的配置类
* @author zhaoxinguo
* @date 2020/6/6 15:05
*/
@Configuration
@EnableCaching //缓存启动注解
public class RedisConfig {

//redis连接工厂
@Resource
private LettuceConnectionFactory lettuceConnectionFactory;

/**
* 配置自定义redisTemplate
* @return
*/
@Bean
public RedisTemplate<String, Object> redisTemplate() {

RedisTemplate<String, Object> template = new RedisTemplate<>();
template.setConnectionFactory(lettuceConnectionFactory);

//使用FastJsonRedisSerializer序列化和反序列化redis的key、value值
template.setValueSerializer(fastJsonRedisSerializer());
template.setKeySerializer(fastJsonRedisSerializer());
template.afterPropertiesSet();
return template;
}

/**
* fastjson序列化Bean
* @return
*/
@Bean
public FastJsonRedisSerializer<?> fastJsonRedisSerializer() {
return new FastJsonRedisSerializer<>(Object.class);
}

}

到这里,实现的代码已经演示完毕了,是不是非常简洁。因为这里Spring Security都已经帮我们实现好了session存入redis中,我们只要配置下就可以用了

启动项目前要先启动redis服务,我们看看效果

Spring Boot2 _ Spring Security5 基于Redis的Spring Session管理_5_ - 03.png

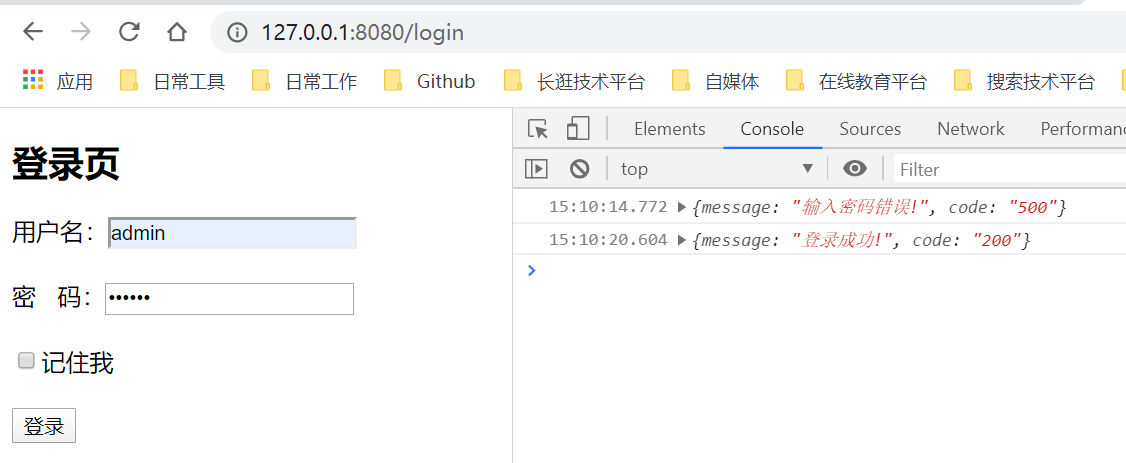
当我点击登录并成功登录后,看看redis:

Spring Boot2 _ Spring Security5 基于Redis的Spring Session管理_5_ - 04.png

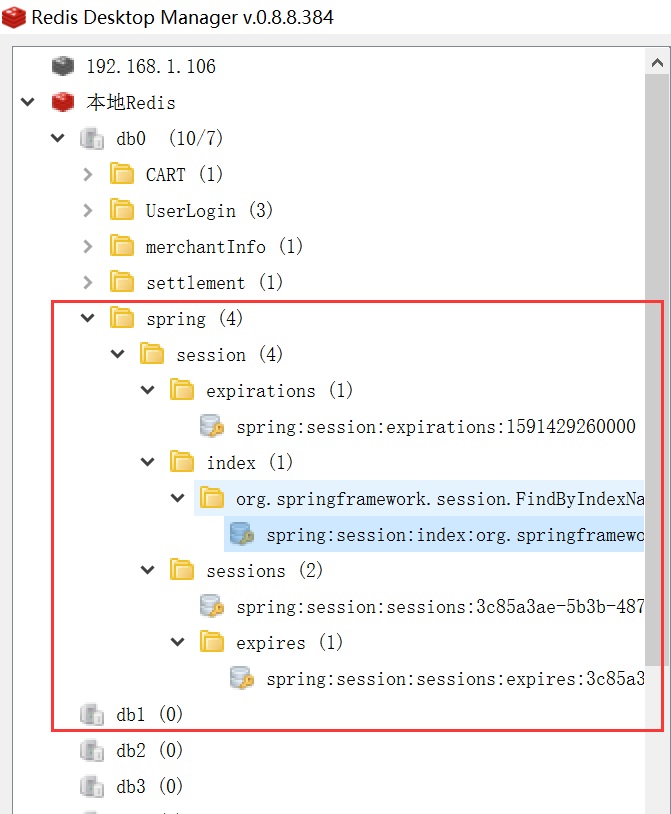
可有清楚的看到,redis已经存储了session相关信息

结束语

那么基本代码和效果也演示完毕了

源码获取方式加加入QQ交流群(715224124),进群找群主要源码,如果有问题,可以提出疑问,群主会尽量帮助解决~

希望能帮助到大家,如果有不好或者错误的地方希望能多多提出,谢谢大家~

MiCai wechat
扫一扫,关注微信订阅号
坚持原创技术分享,您的支持将鼓励我继续创作!