前言
上篇文章介绍了Spring Boot Security基于Redis的Spring Session管理
本篇文章,可以说比较核心、实用的功能,动态用户角色资源管理(RBAC),可能篇幅会比较长,废话不多说,马上进入正题
简单介绍
相信每个正规的系统,都会对系统安全和访问权限有严格的控制。简单的一句话总结,就是对的人访问对的资源,这里可能会比较抽象,博主给大家举个例子就懂了:
现在假设有个系统,里面有菜单A、菜单B和菜单C
客户有这么个需求,就是对于管理员来说,可以访问所有资源菜单,对于普通用户来说,只能访问菜单A和菜单B,如图:
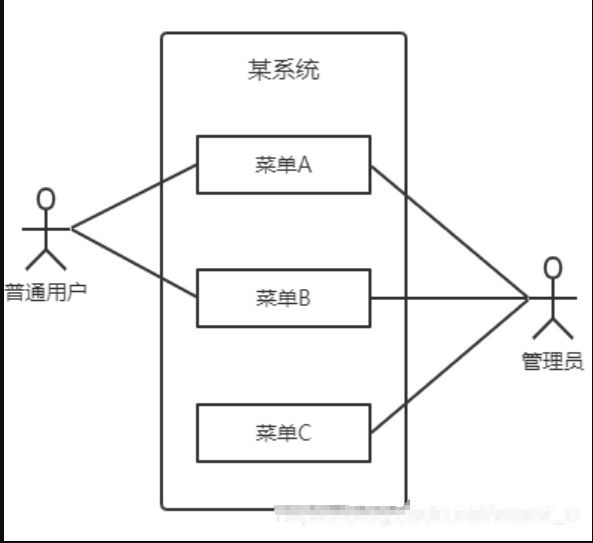
相信这个也是广大系统都有的最基础的需求,那么在系统中的表现,就是用户登录了系统后,如果是普通用户的话,前端只显示菜单A和菜单B,其他途径访问(直接输入URL)菜单C会被提示无权限,而管理员则显示所有菜单
那么怎么实现呢,小编这里就是基于RBAC模型去实现的,简单来说就是:

举个例子:
- 用户就是登录系统的用户,像张三、李四、小王这样的具体登陆用户
- 角色就是假如张三是教师、李四是学生,那么教师和学生角色,也可能可以分得更细,这个根据需求来定义
- 资源就是访问系统的资源,如查询学生信息、编辑学生信息等等之类
用户和资源是没有直接关联的,用户是通过关联角色,角色再关联资源这种间接的方式去判断自己的资源权限。这样做的好处就是可以更简单直观的去管理用户资源间的关联,不需要说每创建一个用户,就去再重新分配资源这么繁琐,减少数据库冗余设计
数据库设计
数据库表的设计如图:
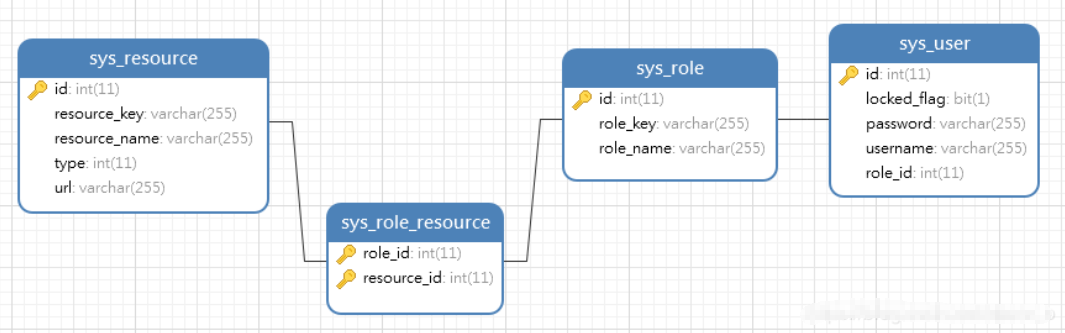
这里有几点要说明下:
- 一般 用户 与 角色 是一对一或者一对多的关系,我这里为了方便所以选择一对一的关系
- 角色 与 资源 是多对多的关系,所以需要中间表 sys_role_resource 存储中间的联系
实体代码如下:
Role.java
1 | /** |
这里要说明下,GrantedAuthority 接口中的getAuthorities()方法返回的当前用户对象拥有的权限,简单的说就是该用户的角色信息,所以这里我角色标识roleKey表示
Resource.java
1 | /** |
相信这些代码大家都看得明白,下面开始进入核心部分
实现
在这里,博主介绍下怎么在Spring Security中实现资源管理功能,也就是针对不同的用户角色,动态的判断是否能访问相应的资源菜单
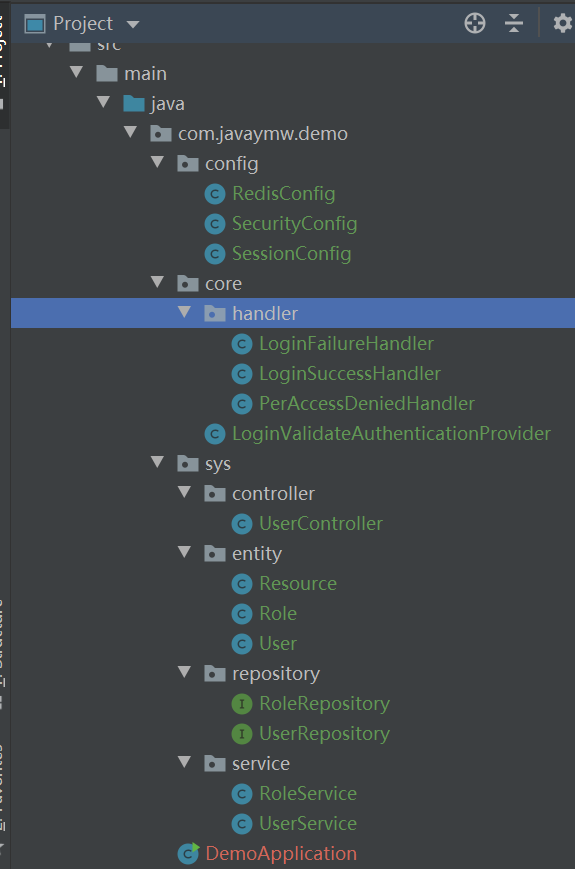
先看看项目结构图:
首先,我们需要在自定义登录认证那里,设置权限信息:
LoginValidateAuthenticationProvider.java
1 | /** |
这里要注意的是,我们把resource实体的resourceKey作为资源的权限标识,设置进grantedAuthorities集合里面,以便spring security根据注解@PreAuthorize自动权限判断
由于我们设计的用户与角色是一对一关联,所以我们这里GrantedAuthority集合就只有一条角色信息数据
然后就是自定义权限不足handler
PerAccessDeniedHandler.java
1 | /** |
最后我们看看Spring Security配置类的变化:
SecurityConfig.java
1 | /** |
在Spring Security配置文件中,我们只需要设置PerAccessDeniedHandler就可以了,还要记得在头部添加@EnableGlobalMethodSecurity(securedEnabled = true, prePostEnabled=true)注解,以启动spring security注解生效
接下来就是前端页面和控制层:
UserContorller.java
1 | /** |
这里要注意的是,每个需要权限判断的方法中,都需要增加@PreAuthorize(“hasAuthority(‘key’)”)注解,否则权限判断不生效,key对应数据库资源表中的资源标识字段
index.html
1 |
|
这里简单的说说数据库的数据
用户表:admin、teacher和student
角色表:管理员、教师和学生
资源表:menu1、menu2、menu3
对应权限:
管理员:menu1、menu2、menu3
教师:menu1、menu2
学生:meun1
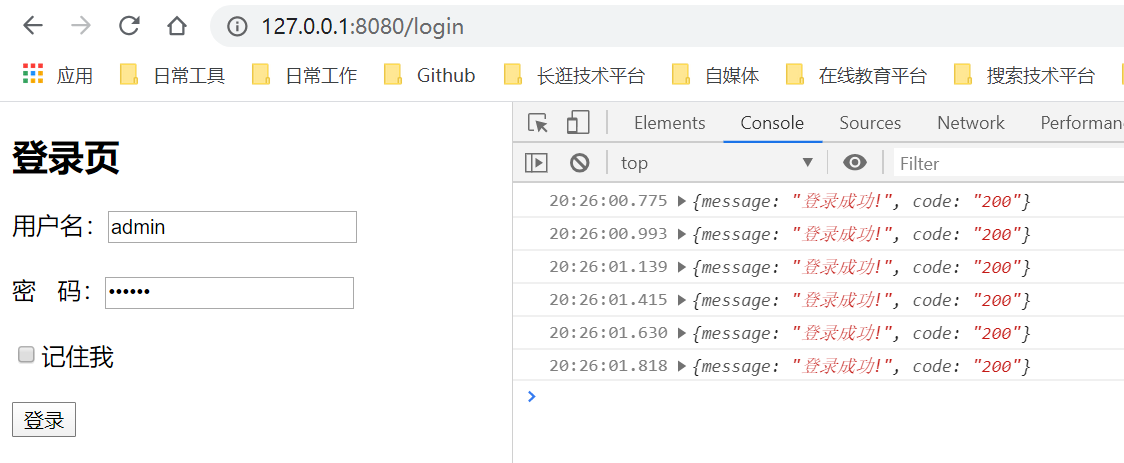
下面我们看看效果,登录页:
index页:
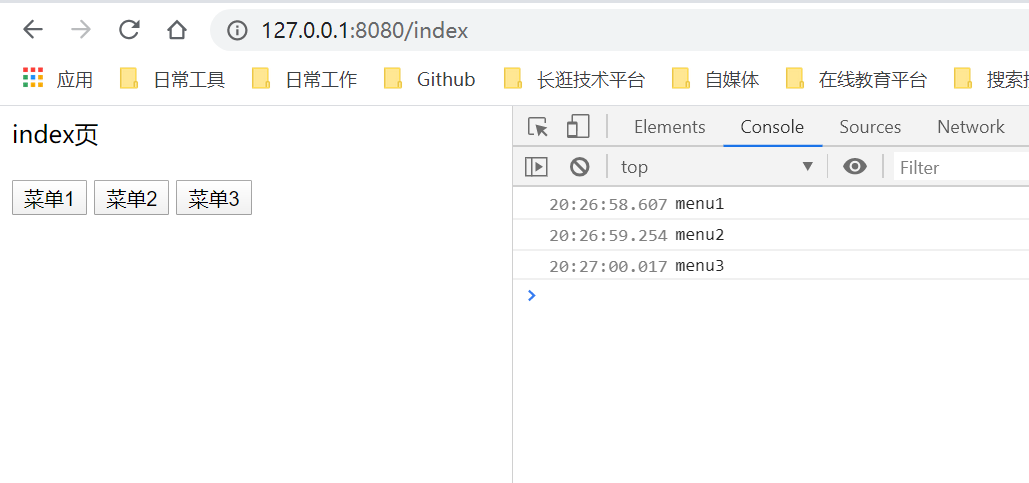
这里我们先用admin管理员角色登录,然后点击所有菜单:
可以看到数据正常,并且已经访问到了所有资源菜单
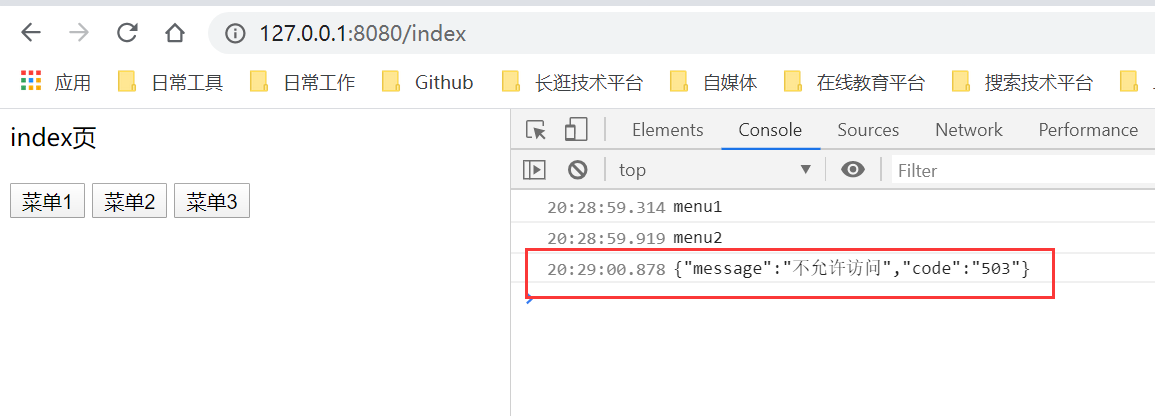
然后我们用 teacher教师角色 登录,也是点击所有菜单:
会发现,在点击第三个菜单的时候,会返回没有权限访问
我们再用 student学生角色 登录,也是点击所有菜单:
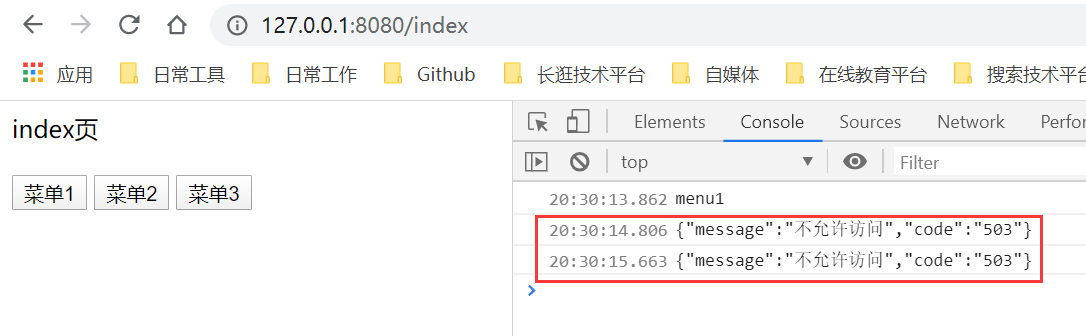
这里说明我们的动态权限资源管理都生效了
那么文章就介绍到这里,在这里留了个坑,一般系统是不会让用户去点击了菜单才发现没有权限访问,而是针对不同的用户,动态显示不同的菜单,这个内容小编下篇文章就会讲解
结束语
那么基本代码和效果也演示完毕了
源码获取方式加加入QQ交流群(715224124),进群找群主要源码,如果有问题,可以提出疑问,群主会尽量帮助解决~
希望能帮助到大家,如果有不好或者错误的地方希望能多多提出,谢谢大家~