Spring Boot2 + Spring Security5 记住我功能(4)

前言

上篇文章介绍了Spring Boot Security配置了自定义登录
本篇文章,博主会介绍实现记住我功能

开始

Spring Security记住我功能,其实就是就是当用户勾选了”记住我”然后成功认证登录了,那在有效时间内免登录直接进入
那么,Spring Security实现记住我的方式有两种:

  • 1.本地存储(cookie)
  • 2.持久化存储

这里博主简单的说下流程,当Spring Security用户登录成功的时候,它会生成授权信息(token)
然后方法一的话,Spring Security会把token传输到用户本地浏览器cookie里面存储起来
方法二的话就是把token存入数据库中,那么相信大家也就清楚了

像token这种敏感的数据,是不建议暴露用户那边的,因为这样很容易会被中间人劫持,又或者被伪造请求(CSRF),所以博主是建议使用第二种办法

那么下面开始展示实现代码,,我们继上篇的代码,在Spring Security配置类上添加持久化配置:

1
2
3
4
5
6
7
8
9
10
11
12
13
14
15
16
17
18
19
20
21
22
23
24
25
26
27
28
29
30
31
32
33
34
35
36
37
38
39
40
41
42
43
44
45
46
47
48
49
50
51
52
53
54
55
56
57
58
59
60
61
62
63
64
65
66
67
68
69
70
71
72
73
74
75
76
77
78
79
80
81
82
83
84
85
86
87
88
89
90
91
92
93
94
95
96
97
98
99
100
101
102
103
104
105
106
107
108
109
110
111
112
113
114
115
116
117
/**
* Copyright 2020. javaymw.com Studio All Right Reserved
* <p>
* Create on 2020-06-05 21:58
* Created by zhaoxinguo
* Version 2.0.0
*/
package com.javaymw.demo.config;

import com.javaymw.demo.core.LoginValidateAuthenticationProvider;
import com.javaymw.demo.core.handler.LoginFailureHandler;
import com.javaymw.demo.core.handler.LoginSuccessHandler;
import com.javaymw.demo.sys.service.UserService;
import org.springframework.context.annotation.Bean;
import org.springframework.context.annotation.Configuration;
import org.springframework.security.config.annotation.authentication.builders.AuthenticationManagerBuilder;
import org.springframework.security.config.annotation.method.configuration.EnableGlobalMethodSecurity;
import org.springframework.security.config.annotation.web.builders.HttpSecurity;
import org.springframework.security.config.annotation.web.configuration.EnableWebSecurity;
import org.springframework.security.config.annotation.web.configuration.WebSecurityConfigurerAdapter;
import org.springframework.security.crypto.bcrypt.BCryptPasswordEncoder;
import org.springframework.security.crypto.password.PasswordEncoder;
import org.springframework.security.web.authentication.rememberme.JdbcTokenRepositoryImpl;
import org.springframework.security.web.authentication.rememberme.PersistentTokenRepository;

import javax.annotation.Resource;
import javax.sql.DataSource;

/**
* @description: Spring Security 核心配置类
* @author zhaoxinguo
* @date 2020/6/5 21:57
*/
@Configuration
@EnableWebSecurity
@EnableGlobalMethodSecurity(securedEnabled = true)
public class SecurityConfig extends WebSecurityConfigurerAdapter {

//数据源
@Resource
private DataSource dataSource;

//用户业务层
@Resource
private UserService userService;

//自定义认证
@Resource
private LoginValidateAuthenticationProvider loginValidateAuthenticationProvider;

//登录成功handler
@Resource
private LoginSuccessHandler loginSuccessHandler;

//登录失败handler
@Resource
private LoginFailureHandler loginFailureHandler;

/**
* 权限核心配置
* @param http
* @throws Exception
*/
@Override
protected void configure(HttpSecurity http) throws Exception {
//基础设置
http.httpBasic()//配置HTTP基本身份验证
.and()
.authorizeRequests()
.anyRequest().authenticated()//所有请求都需要认证
.and()
.formLogin() //登录表单
.loginPage("/login")//登录页面url
.loginProcessingUrl("/login")//登录验证url
.defaultSuccessUrl("/index")//成功登录跳转
.successHandler(loginSuccessHandler)//成功登录处理器
.failureHandler(loginFailureHandler)//失败登录处理器
.permitAll()//登录成功后有权限访问所有页面
.and()
.rememberMe()//记住我功能
.userDetailsService(userService)//设置用户业务
.tokenRepository(persistentTokenRepository())//设置持久化token
.tokenValiditySeconds(24 * 60 * 60);//记住登录1天(24小时 *60分钟 * 60秒)
//关闭csrf跨域攻击防御
http.csrf().disable();
}

@Override
protected void configure(AuthenticationManagerBuilder auth) throws Exception {
//这里要设置自定义认证
auth.authenticationProvider(loginValidateAuthenticationProvider);
}

/**
* BCrypt加密
* @return
*/
@Bean
public PasswordEncoder passwordEncoder() {
return new BCryptPasswordEncoder();
}

/**
* 记住我功能,持久化的token服务
* @return
*/
@Bean
public PersistentTokenRepository persistentTokenRepository(){
JdbcTokenRepositoryImpl tokenRepository = new JdbcTokenRepositoryImpl();
//数据源设置
tokenRepository.setDataSource(dataSource);
//启动的时候创建表,这里只执行一次,第二次就注释掉,否则每次启动都重新创建表
tokenRepository.setCreateTableOnStartup(true);
return tokenRepository;
}

}

首先,要想存储到数据库种,那是需要创建数据库表存储,这里通过tokenRepository.setCreateTableOnStartup(true)方法就可以让Spring Security自动创建数据库表,不过记得下次启动的时候一定要注释起来

其次就是在权限核心配置方法中追加了.rememberMe()的一系列配置。

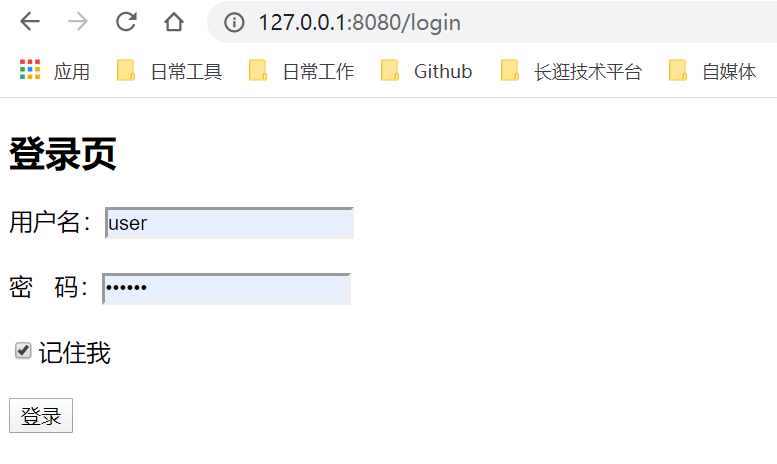
接下来,在前端登录页面上,需要新添加一个复选框,然后加上属性name=”remember-me”即可记住我

login.html

1
<input type="checkbox" name="remember-me"/>

完整代码如下:

1
2
3
4
5
6
7
8
9
10
11
12
13
14
15
16
17
18
19
20
21
22
23
24
25
26
27
28
29
30
31
<!DOCTYPE html>
<html lang="en">
<head>
<meta charset="UTF-8">
<title>登录页</title>
</head>
<body>
<h2>登录页</h2>
<form id="loginForm" action="/login" method="post">
用户名:<input type="text" id="username" name="username"><br/><br/>
密&nbsp;&nbsp;&nbsp;码:<input type="password" id="password" name="password"><br/><br/>
<input type="checkbox" name="remember-me"/>记住我<br/><br/>
<button id="loginBtn" type="button">登录</button>
</form>
<script src="http://libs.baidu.com/jquery/2.1.4/jquery.min.js"></script>
<script type="text/javascript">
$("#loginBtn").click(function () {
$.ajax({
type: "POST",
url: "/login",
data: $("#loginForm").serialize(),
dataType: "JSON",
success: function (data) {
console.log(data);
//window.location.href = "/index";
}
});
});
</script>
</body>
</html>

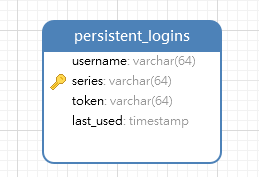
开始启动程序,之后打开数据库会发现自动创建了存储token的persistent_logins表:

Spring Boot2 _ Spring Security5 记住我功能_4_-01.png

然后再看看登录效果:

Spring Boot2 _ Spring Security5 记住我功能_4_ -02.png

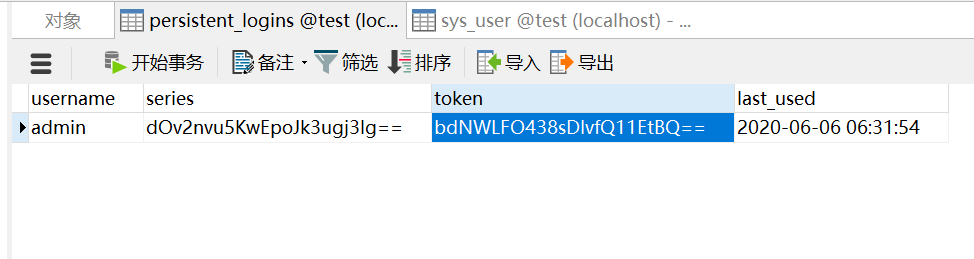
当我点击登录并登录成功后,persistent_logins表就多了条信息:

Spring Boot2 _ Spring Security5 记住我功能_4_-04.png

那么基本代码和效果也演示完毕了

源码获取方式加加入QQ交流群(715224124),进群找群主要源码,如果有问题,可以提出疑问,群主会尽量帮助解决~

希望能帮助到大家,如果有不好或者错误的地方希望能多多提出,谢谢大家~

MiCai wechat
扫一扫,关注微信订阅号
坚持原创技术分享,您的支持将鼓励我继续创作!